Pirate Polish

This blog is the home of Pirate Polish! To see Pirate Polish swatches, click here. To visit Pirate Polish on Facebook, click here.
Showing posts with label black. Show all posts

Monday, July 22, 2013

Deborah Lippmann Don't Tell Mama and Supermodel

Today I've got two lovely Deborah Lippmann lacquers to share with you; first up is Don't Tell Mama, a blackened emerald shimmer. I believe this was two coats. 


Secondly, I've got Supermodel, a gorgeous tangerine-red jelly. This was three coats, and it mostly covers visible nail line, but retains a lot of wonderful squishy jelly-ness.


Of these two, I'm rather enamoured with the bright, clean tangerine red of Supermodel. Extremely attention-grabbing! And I can certainly recommend Don't Tell Mama if you're in the market for a good blackened shimmer.

I picked these up a couple months ago during a big sale Nail Polish Canada had on Lippmann polishes- and if you're interested, you can still nab some of these pretties for about 50% off. Are there any Deborah Lippmann polishes you would recommend?

Saturday, July 6, 2013

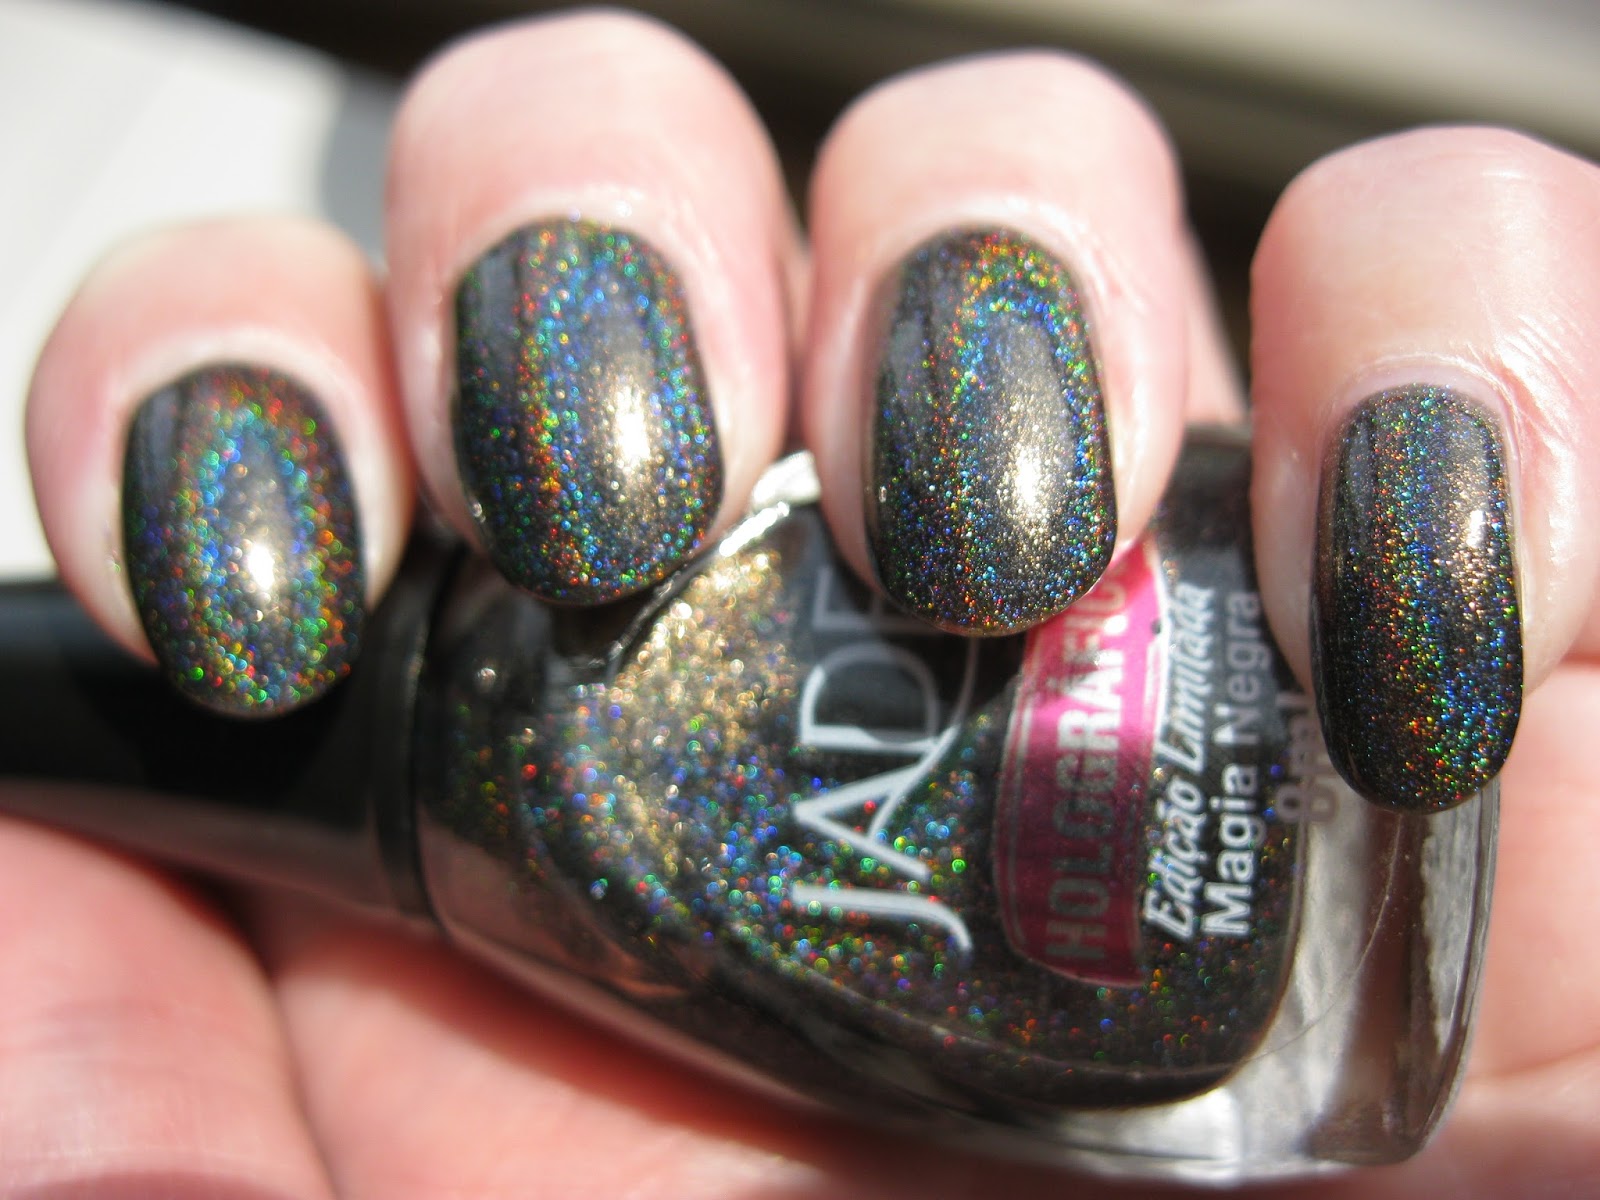
Jade - Magia Negra

Alright, folks. I've just discovered the most amazing black holographic polish ever made. All other contenders can officially pack it in. They're not touching Jade's Magia Negra. Observe:


Sunny days were made for this lacquer (and not the other way around...).

Jade Holografico polishes are available from both Llarowe and Ninja Polish. It's currently out of stock at Llarowe, but it is in stock at Ninja Polish- which is where I'm assuming you'll be heading after having seen these swatches. Well, what are you waiting for?

Sunday, May 12, 2013

Man Glaze Cabron and Black Cat Lacquer Black Hole

Feast your eyes on Man Glaze Cabron: a shimmery matte in a deep blackened indigo purple shade. Very dramatic, and totally stunning. As we've come to expect, the label art is amazing. 


On a side note, whenever I pull this lacquer out I immediately start humming this song (which is a great bonus to owning this polish, now that I think about it):


Finally, I've got a few glorious snapshots of how Cabron looks with Black Cat Lacquer's Black Hole layered overtop; you might recall that I first showed this one on my blog here, but failed utterly at choosing a winning layering combination. I'd say that problem has been rectified here, wouldn't you agree?


Thursday, April 4, 2013

Maybelline Cocktail Dress

Tonight I've got a quick post to share with you- this is Maybelline Cocktail Dress, a fine black glitter with bigger red hexagonal glitter mixed in. The formula was just okay- I think this took three coats to achieve opacity. 


It actually reminds me a little bit of one of the OPI Mariah Carey Liquid Sands, "Stay The Night". The red glitter in the OPI is smaller and more of a magenta-pink, and of course the OPI also has the textured element to it, but they are somewhat similar in overall effect.

What do you think of Maybelline's Cocktail Dress? Does the name annoy anyone else? It makes me think that this is a lacquer with an identity crisis: "I'm not a nail varnish... I'm a dress! A REAL dress!" Alrighty, then, little delusional polish. It's kinda cute when you think of it that way, I suppose.

Wednesday, March 13, 2013

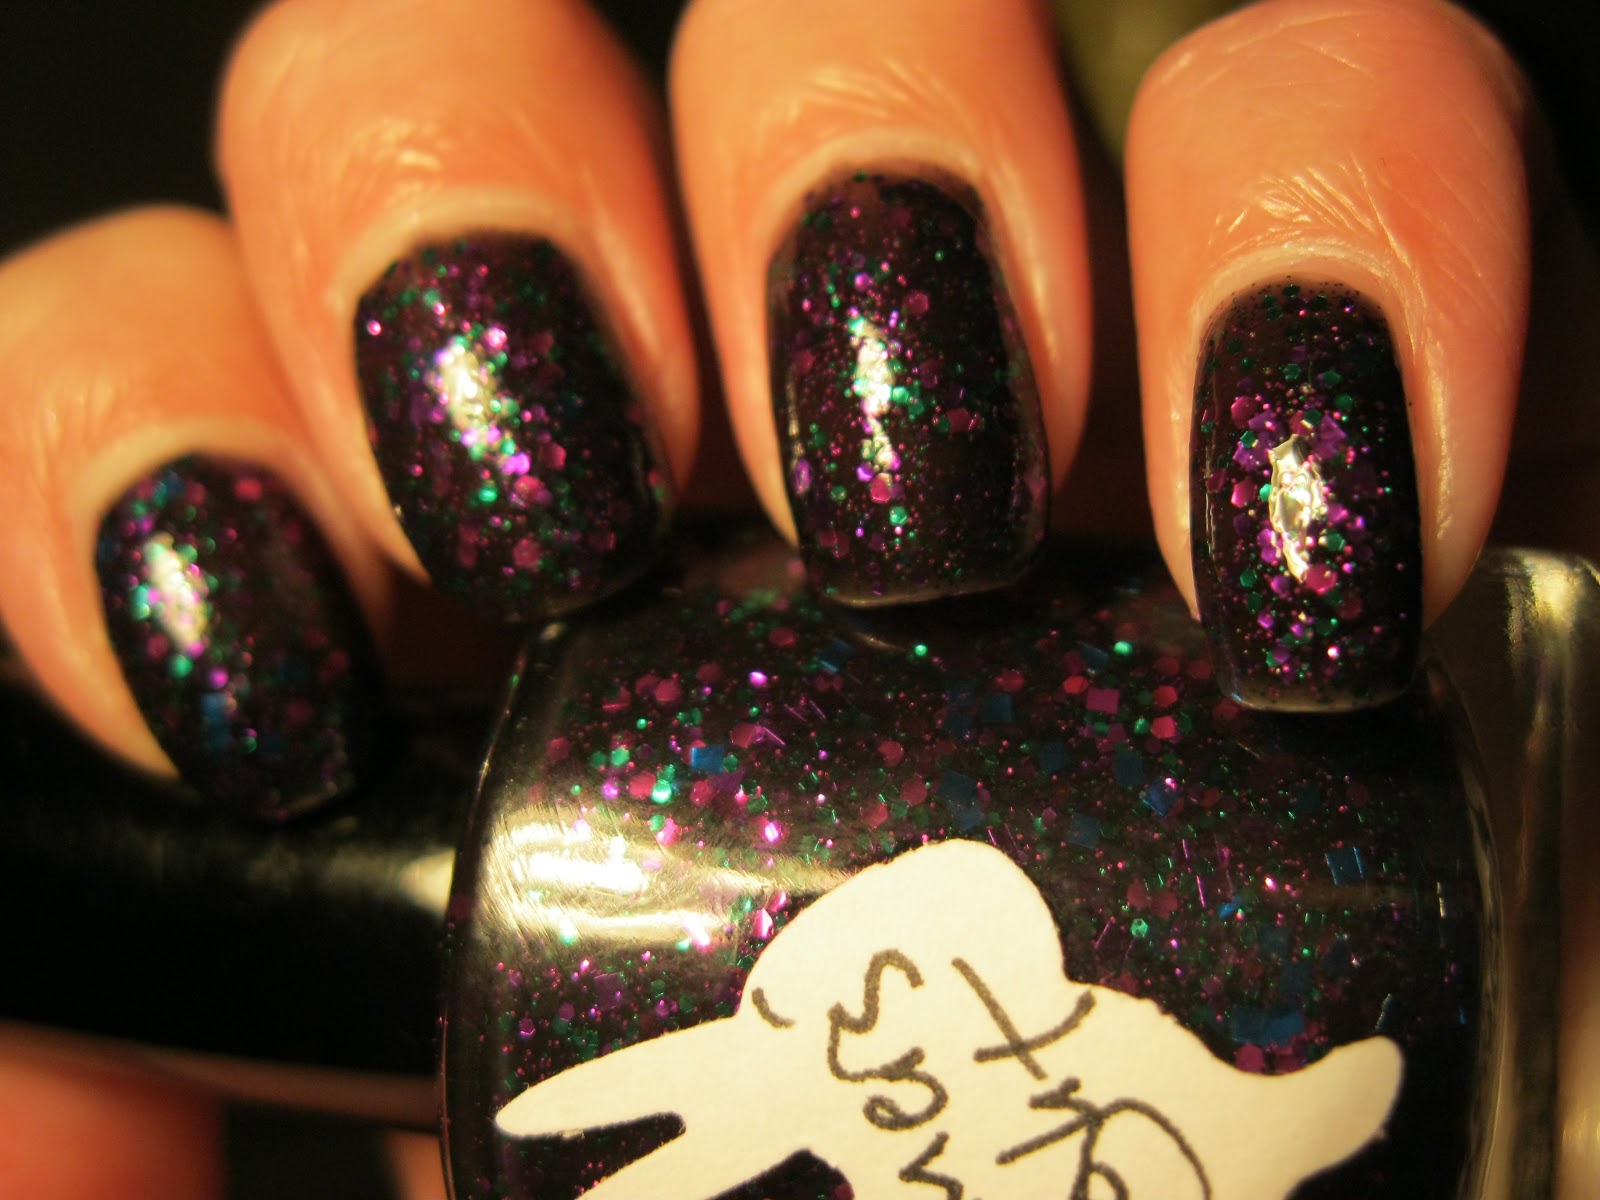
Hare Polish - Midsummer's Midnight

Tonight I've got a gorgeous lacquer from Hare Polish to share with you; this is Midsummer's Midnight, and it's a black jelly polish with lots of purple, green, and blue glitters swimming in it. I especially love the blue squares in this- they're not as numerous as the purple and green glitters, and it adds so much depth. If I recall correctly, this was opaque in two thick coats. 


This was also my first experiences using white glue as a base for a glitter polish; if you haven't heard about this method of glitter removal, read all about it here. I just emptied some white glue into an empty polish bottle, and applied it as a base coat (allowing it to dry completely) before applying my polish. Unfortunately, removal wasn't as slick for me as I'd hoped. It seems to work great for other people, but in my case I really struggled to get the polish off and I think it stripped some of the surface of my nail off with it (I really should have just given up and broken out the remover, but I was stubborn enough to want to finish what I'd started). Oh well, back to the tin foil method for me!


Have you tried using white glue as a method for making glitter polish removal easier? What were your experiences?

Wednesday, February 6, 2013

Layla Bubble Effect in Black Forest

Today I've got one of the Layla Bubble Effect polishes to share with you- this is Black Forest, a polish very similar to OPI's Black Spotted lacquer (which was exclusive to Europe, if I understand correctly). In terms of application, I applied this as I would a shatter topcoat: I used one medium coat, applied it quickly and evenly, and then I stopped fussing with it. The end result was this oil-on-water kind of effect. The base colour is SpaRitual Quietness


I also layered this over Man Glaze's Butt Taco (oh, that name...) which I think provided a more striking effect.


What do you think of Layla Bubble Effect in Black Forest? Think it would quell any lemming for the hard-to-procure OPI Black Spotted? If so, and you're wondering where you can order it, you can find it at Nail Polish Canada, which is where I ordered mine from. 

Tuesday, January 29, 2013

OPI Stay The Night (Liquid Sand)

I couldn't resist picking up the four new OPI liquid sand minis- I'm always intrigued by a new texture/effect in nail polish, and I haven't seen anything quite like this before. Today I've got "Stay The Night" to show you- this is a black with red glitter combination. It makes me think of asphalt with glowing red embers. I found application to be easy, and this covered in two coats. In reality, the red glitter in this sparkles like crazy- definitely worth checking out in person!


This last picture was taken shortly after application, and it looks a little bit glossy yet. I did find that in order to maximize the fully matte "liquid sand" look, it is best to let this one dry completely. I've noticed that with some swatches of Stay The Night other bloggers have mentioned that they wish it was less glossy and more matte- I think this may be partly because Stay The Night was swatched, but not allowed to fully dry. Just a hunch, anyways.


Overall, I really like the liquid sand effect. It's not terribly gritty, although if you're sensitive to texture you might not like it. The best way I could think to describe it was that it feels kind of like a cat's tongue. Okay, that sounds like a weird comparison to make, but it's strangely accurate. It's not so gritty that it will snag on anything, but it does feel kind of rough. 

The other interesting thing I noticed about this polish is that when first applied, it looks like a normal non-glitter polish. Then it kind of granulized into this grittier finish. Pretty cool. Removal was also a breeze- not at all like removing an all-glitter polish. 

What do you you think of the liquid sand finish? Have you, or will you, be trying these out? I'd love to hear your thoughts on these!

Monday, December 24, 2012

Merry Christmas! Sally Hansen Nail Strips in Prep's Cool

It's rare that I post a manicure on the actual day I happen to be wearing it, but tonight you're getting my *actual* Christmas manicure. Sally Hansen Nail Strips in Prep's Cool are currently adorning my nails, and I couldn't be happier. I actually picked this up last year, but have been saving it for a special occasion; this Christmas certainly qualifies! Not only were these relatively easy to apply, but they look amazing. I'm thrilled with the pattern, and as always, the wear time is second to none. Because we're travelling a bit this holiday, this was the perfect choice- no need to worry about repairing a chipped manicure, and I get about a solid week of wear from the metallic Sally Hansen nail strips before any major flaws show up. I do slap a coat of Seche Vite overtop, and that seems to help ensure extra long wear time (not to mention making my manicure brilliantly shiny). 


And some obligatory manicure pics + seasonal props:


Merry Christmas, dear readers! I hope you're all having a good one.

Tuesday, December 11, 2012

A-England Princess Sabra / Black Cat Lacquer Black Hole

I must say, I have never been let down by an A-England polish. Another amazing colour with a flawless formula. Princess Sabra is a gorgeous golden-olive with a linear holographic effect. This was such a dream to apply and wear... it just feels effortlessly chic. 


I decided to attempt an accent nail with Black Cat Lacquer's Black Hole, although I think a different base colour might have helped it pop more. Love the holographic black diamond glitter in this, though. The bottle looked amazing in the sun (somewhat visible in the second picture).


What do you think of A-England's Princess Sabra? Can you think of any other possible pairings for Black Hole?

Finally, I'll leave you with a few details about a recent purchase; every holiday I look forward to holiday-themed scents. Philosophy is a notable one for putting out delicious-smelling shower gels, and this year I couldn't resist their "Cookbook": a set of four scented shower gels in Old-Fashioned Eggnog, Buttered Rum, Cinnamon Buns, and Peppermint Bark.


I'm happy to say that all of these smell delicious, and I've especially been enjoying the eggnog and buttered rum scents... because it's basically a perfect start to the day when I can roll out of bed, jump into the shower, and come out smelling like rum.

Wednesday, November 21, 2012

A belated Halloween manicure!

Tonight I've got a Halloween manicure to share with you- I wish I'd posted it before now, but better late than never. And this is a good one. 

I started out with Layla Mercury Twilight, a gorgeous silver holographic. There are tonnes of silver holographics out there, but this is the only one you need. Stunning. 


Then I added a few Halloween-themed water decals to the manicure; I'd never used water decals before, and at first was kind of intimidated. But it's actually super easy! Just cut out the decals, and dunk them in mildly warm water for a minute. The backing will peel off, and you just slide it onto the nail, and manoeuvre it to where you want it. As a nail art novice, this was an easy way of accomplishing a cute mani. I was extremely pleased with the end result, and the stark black of the design contrasts wonderfully with the silver holo base. Very cool looking.


The water decals are available here, via an online retailer called KKCenterHK. The product number is "N.NAIL-WDHHK099". 

What do you think of my belated Halloween manicure? Have you tried water decals before?


*Nail decals were sent to me for unbiased review; all opinions are my own.